Manage Users and Groups in the Enterprise Portal (Preview)
Enterprise Portal (EP) Admins can see all managed users and groups across all sub organizations in the EP, and quickly take action to resolve any issues.
Terminology:
- Enterprise Portal: Portal where Enterprise Admins manage settings for multiple organizations under one Enterprise Configuration. Differs from the JumpCloud Admin Portal, which is for one organization
- Enterprise (formerly Enterprise Configuration): Centralized hub for all the organizations' objects in the Enterprise Portal. Items can be created and shared for organizations in the Enterprise Portal from this hub
- Organizations: A division of the enterprise (for example a region or a country) that maintains its own users, devices, and resources
- Enterprise Administrator: Admin who has full access to all orgs and enterprise resources
- Organization Administrator: Admin whose access is limited to explicitly granted orgs
Considerations:
Users:
- Users can be created or imported at the Enterprise level or after selecting an organization
- Some actions may be dependent on the organization
Groups:
- Enterprise Groups are shared by default to all organizations but will show as disabled at the organization level
- Enterprise Groups can only be edited at the Enterprise level
- Organization Admins can bind:
- Enterprise Group to Organization Resource
- Organization Group to Enterprise Resource
- Organization Group to Organization Resource
- RADIUS
Creating and Viewing Users
To add a new user:
- In your EP, go to Identity Management > Users.
- Click (+) Users and choose the user(s) source.
- Select which Organization the new user belongs to and then click Continue.
- Manually enter the user information or import the user(s) information.
- Click Save User for manually created users or Import for imported users.
See Add Users to the Admin Portal to learn more.
To view and edit user details:
- In your EP, go to Identity Management > Users.
- In the list of users, click on the Username of who you want to view details for.
- The user's details will appear. Their organization will be shown under their username/email.
- Make any edits to the user
- Click Save User.
To filter existing users:
- In your EP, go to Identity Management > Users.
- Search for a specific user in the Search bar at the top of the page.
- Click the Filter dropdown menu for additional filtering options:
- User State
- Password Status
- Account Status
- MFA Enrollment Status
- MFA User Requirement
- Once you’ve selected which filter you want, click Apply.
note
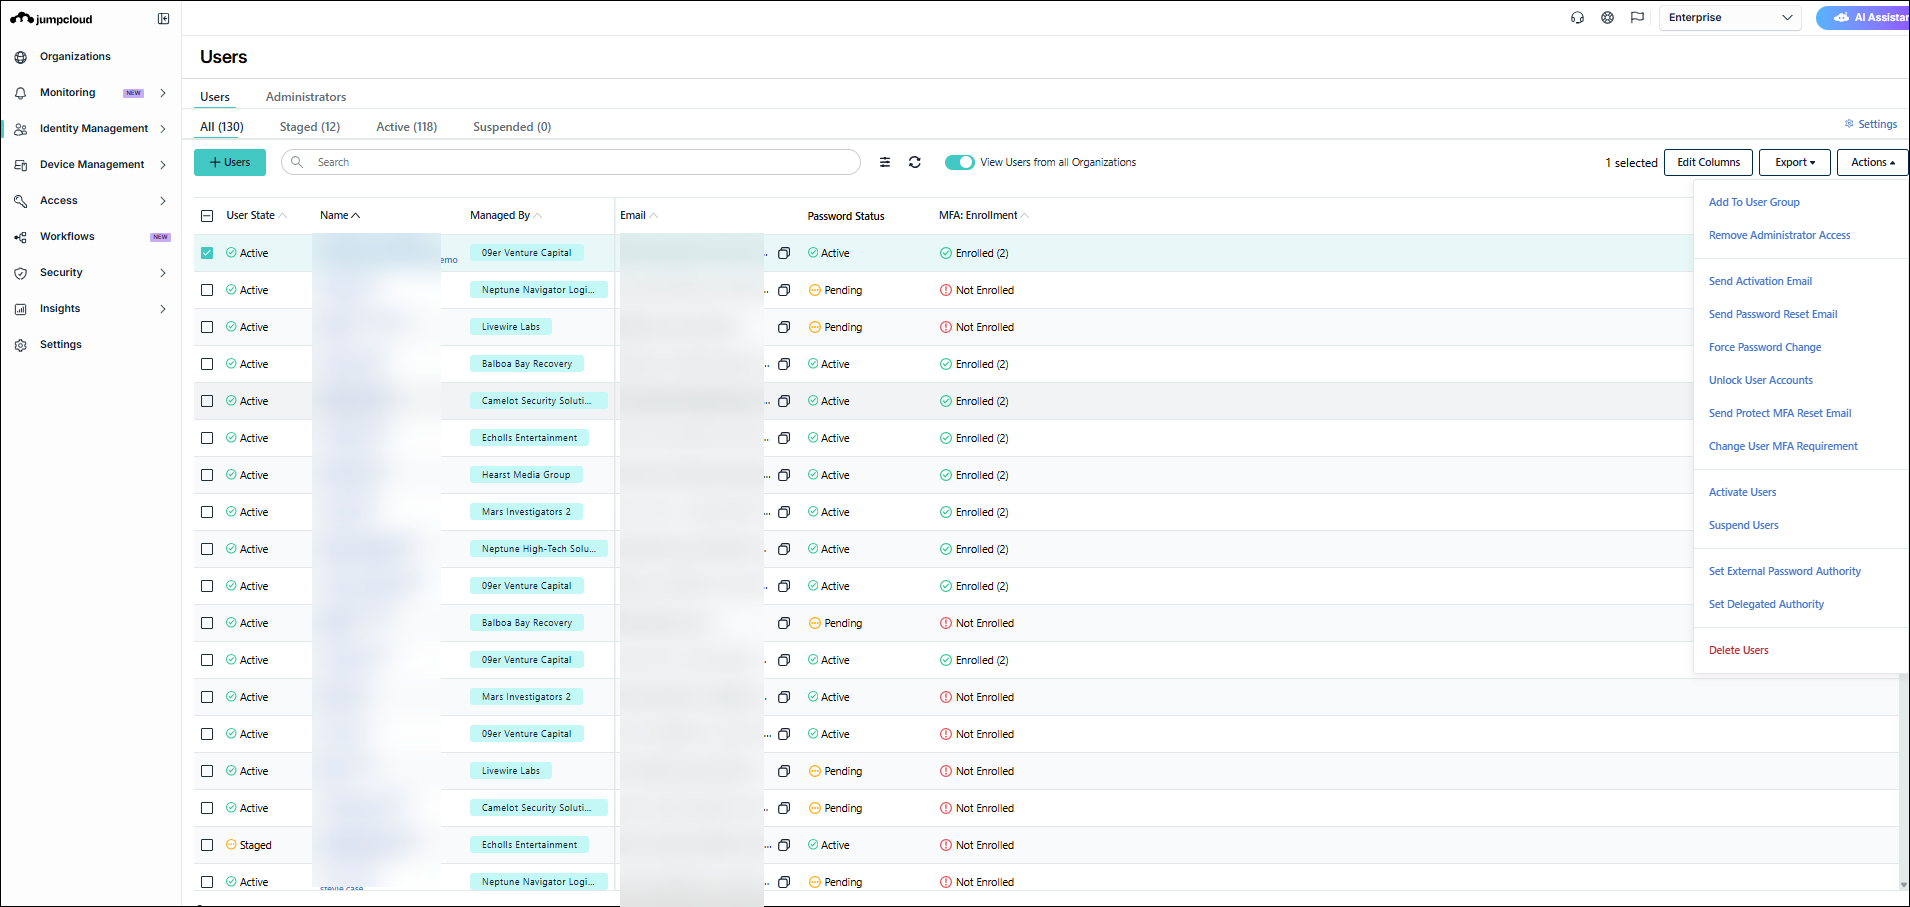
You can also organize your users by clicking on the columns at the top of the page; User State, Name, Managed By, Email, Password Status, and MFA Enrollment.
User Actions
note
Depending on the state of the user, certain actions might not be available. For example, already locked user accounts can’t be locked again.
To apply actions to a user:
- In your EP, Go to Identity Management > Users.
- An aggregate list of all your users will be displayed. Select the user(s) that need to be addressed, then click Actions.
- Select the desired action.
- Once your selection is made, you will be prompted to Confirm or Cancel.
See Add Users to the Admin Portal to learn more.
To export users
- In your EP, Go to Identity Management > Users.
- In the top right corner, click Export. You have the option to download as a CSV or JSON.
- A copy of the file saves locally to your device.
Creating and Viewing User Groups
To add a new group:
- In your EP, go to Identity Management > User Groups.
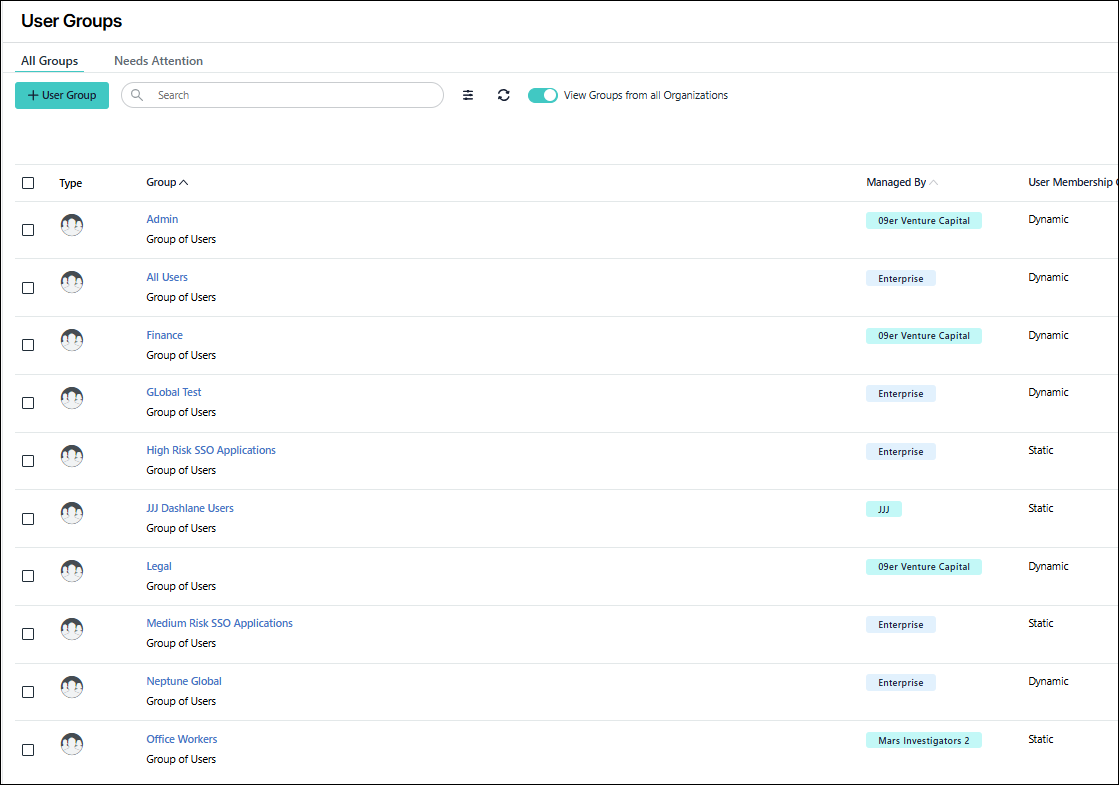
- Click + User Group.
- Select Enterprise or Select Organization and choose the managing organization from the dropdown.
- Click Continue.
- Manually enter the group information.
- Click Save Group.
To view and edit group details:
- In your EP, go to Identity Management > User Groups.
- In the list of groups, click on the group name of the group you want to view details for. The group's organization will be shown under the group name.
- Make any edits to the group.
- Click Save Group when finished.
See Get Started: User Groups and Configure Dynamic User Groups to learn more.
To filter existing Groups:
- In your EP, go to Identity Management > User Groups.
- Search for a specific group in the Search bar at the top of the page.
- You can also click the Filter button for additional filtering options: Membership Suggestions, and Permissions or use the Global Organization dropdown to see groups for one organization.
- Once you’ve selected which filter you want, click Apply.
- You can also filter your groups by using the columns at the top of the page; Group, Managed By and User Membership Controls.
Was this information helpful?